OAuth2
All Studio APIs use the IETF standard OAuth2 Client Credentials Flow to retrieve JSON Web Tokens (JWTs), that act as bearer tokens, that can be used by apps or scripts. We'll refer to these tokens as access tokens for simplicity sake. We use these access tokens to link your API call with your account and ensure the operation you are trying to perform is allowed.
In order to access Clear Street Studio programmatically, there are three basic steps:
- Create OAuth2 credentials for your application.
- Use those credentials to obtain a JWT access token.
- Send that access token to authenticate your calls to Studio APIs.
Create OAuth2 Credentials
Each application/script you write which should have its own credentials to Studio APIs, which you can create and manage yourself from inside Clear Street Studio.
Credentials you create will be linked to your Studio Account and given all the same permissions. In the normal course of business, these credentials will remain valid so long as your account remains active, and you do not revoke them. If you lose or otherwise want to change these credentials, you can simply revoke and replace them.
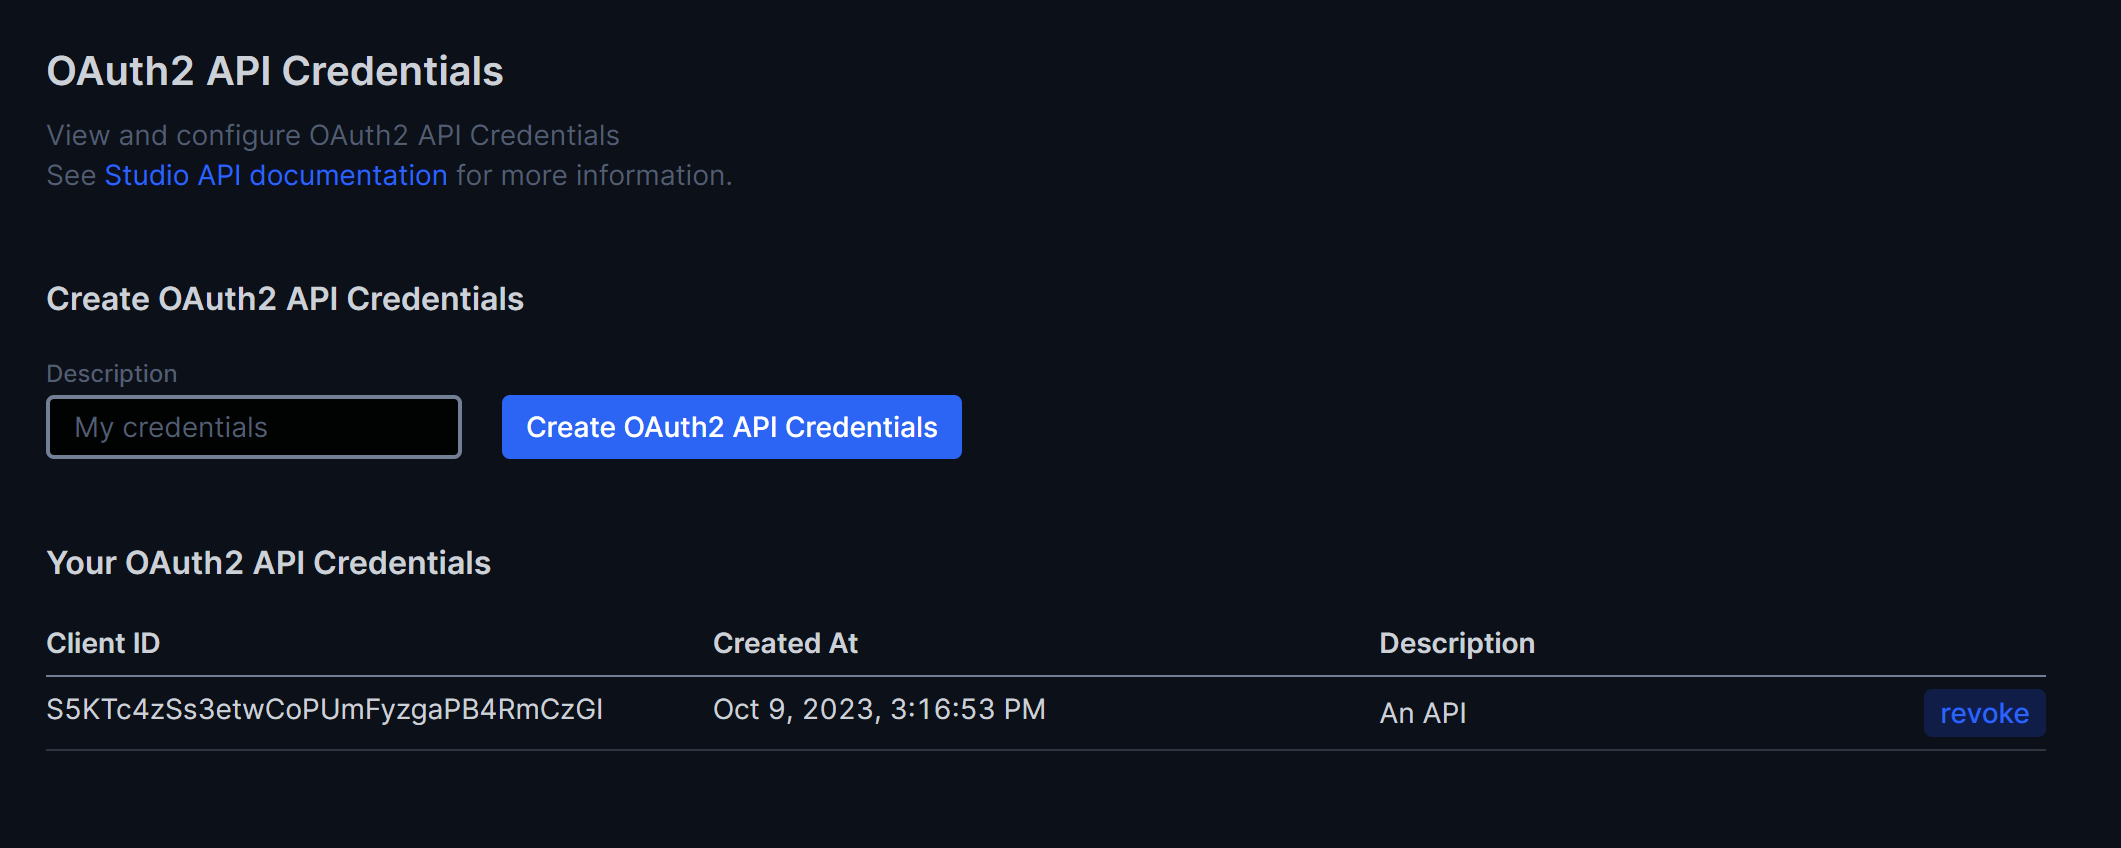
To create new credentials, sign into Studio and click the "Settings" menu-item on the lower-left, followed by the "Developer" tab. You should see the following:

You should enter a description of your application, and then click "Create OAuth2 API Credentials" button. The description is an identifier to help you remember the application associated with your credentials.

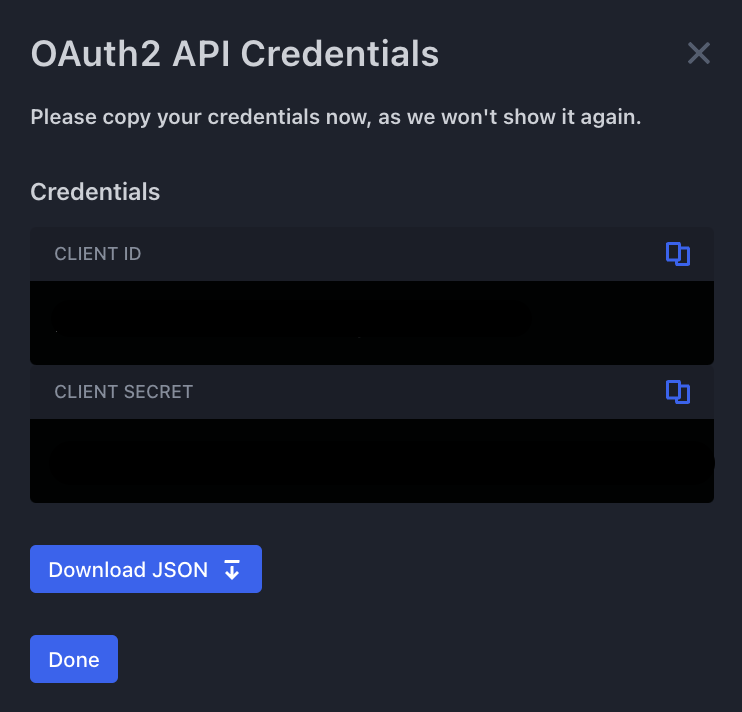
After clicking the create button, a popup, like the one depicted on the right, will appear showing you a randomly generated ID and secret that your application will use.
Additionally, there is a "Download JSON" button will let you download a file which can be used to obtain a token.
Important: You should save the above information in safe and secure location that only you have access to; these credentials are secrets that should be only known to you.
These credentials are not directly used by Studio's APIs. Instead, they are used to generate JWTs, which are then used as bearer tokens when calling Studio endpoints.
Note that Demo credentials will not apply in the Production environment and vice versa. You must obtain credentials for each environment separately.
Create Access Token
Once you've created your OAuth2 credentials, you can now create access tokens which are passed as bearer tokens to Studio API endpoints. As this is part of OAuth2 Client Credentials Flow, your language or framework may have a prescriptive ways to do this. Here's an example of using cURL to create an access token from the command-line:
curl --request POST \
     --url https://auth.clearstreet.io/oauth/token \
     --header 'accept: application/json' \
     --header 'content-type: application/json' \
     --data "@$HOME/Downloads/clearstreet-api-2iryfN.json" \
     --output token-response.json
In this example, we're providing the JSON file containing our OAuth2 credentials to Clear Street's auth servers and downloading the response to a file called token-response.json.
The contents of clearstreet-api-2iryfN.json will look something like this:
{
  "grant_type": "client_credentials",
  "client_id": "2iryfNdUZ0WUb69zrLl23j00FUi4so2u",
  "client_secret": "IxoGj68J4t5IPibv_3nXg9fkRYGtFHs-wEgJF5MecJKZLjyuylyr2B1w1Ifo2r_S",
  "audience": "https://api.clearstreet.io"
}
While the contents of the token-response.json file will look like the below. The value of access_token field is a JWT.
{
  "access_token": "eyJhbGciOiJSUzI1NiIsInR5cCI6IkpXVCIsImtpZCI6IlNSNWIzR0NIYVdQeEFMSFBSNUVXdiJ9.eyJodHRwczovL2FwaS5jbGVhcnN0cmVldC5pby91c2VybmFtZSI6ImF1dGgwfDY0YWVlNjcxZTBkOWUwN2I3NTVmZjU0ZSIsImh0dHBzOi8vYXBpLmNsZWFyc3RyZWV0LmlvL3NsdWciOiJhLW5ldy1hcHBsaWNhdGlvbiIsImlzcyI6Imh0dHBzOi8vYXV0aC1kZXYuY2xlYXJzdHJlZXQuaW8vIiwic3ViIjoiMmlyeWZOZFVaMFdVYjY5enJMbDIzajAwRlVpNHNvMnVAY2xpZW50cyIsImF1ZCI6Imh0dHBzOi8vYXBpLmNsZWFyc3RyZWV0LmlvIiwiaWF0IjoxNjk2NjA1NTY0LCJleHAiOjE2OTY2MDY0NjQsImF6cCI6IjJpcnlmTmRVWjBXVWI2OXpyTGwyM2owMEZVaTRzbzJ1Iiwic2NvcGUiOiJzdHVkaW8iLCJndHkiOiJjbGllbnQtY3JlZGVudGlhbHMifQ.wKgLx9a4mn6R_NUACSjKu2eR4zPOIBPPW6U6GZ5UUD5shRcf-RuhJhsmxeu3xS3I_ZeB4CBMt0FVA3xJfeMfEm8oukFLOwnJd_k-0a9QkROqh3x92fDktP5AXFJyFHmhsaAQ0a51Swbaowm36LV8HOCMzvs447JQGFoCVWVKGpf8KokpGuqWuz5IoF8jwRmeApzWf8KcUJh6oFqODGnDvonD_uxchErShows8o540HNvBGLSc8CVojK9SqrRV7EATQpT5A-qA5W0Qk21_C475RmMcLkMZ0yyg0au4iOlgfvxt8a3o8jKoiN0UXXTKVFu4rDO-R8zvwScDIP9To4ygQ",
  "scope": "studio",
  "expires_in": 1440,
  "token_type": "Bearer"
}
All access tokens are valid for only 24 hours. After this time elapses, you will need to create a new access token.
At this point, you have a valid access token that can be used for both REST APIs and WebSocket APIs.
Updated about 1 year ago